 My beautiful Cherie Amour. The only way it could be more beautiful is if the yarn didn't feel like steel wool. This Cherry Tree Hill Glitter Thick and Thin yarn looks beautiful, but I think the metallic thread that is spun into it is the scratchy culprit. I'm hoping I can forsake comfort for beauty throughout my Christmas celebrations.
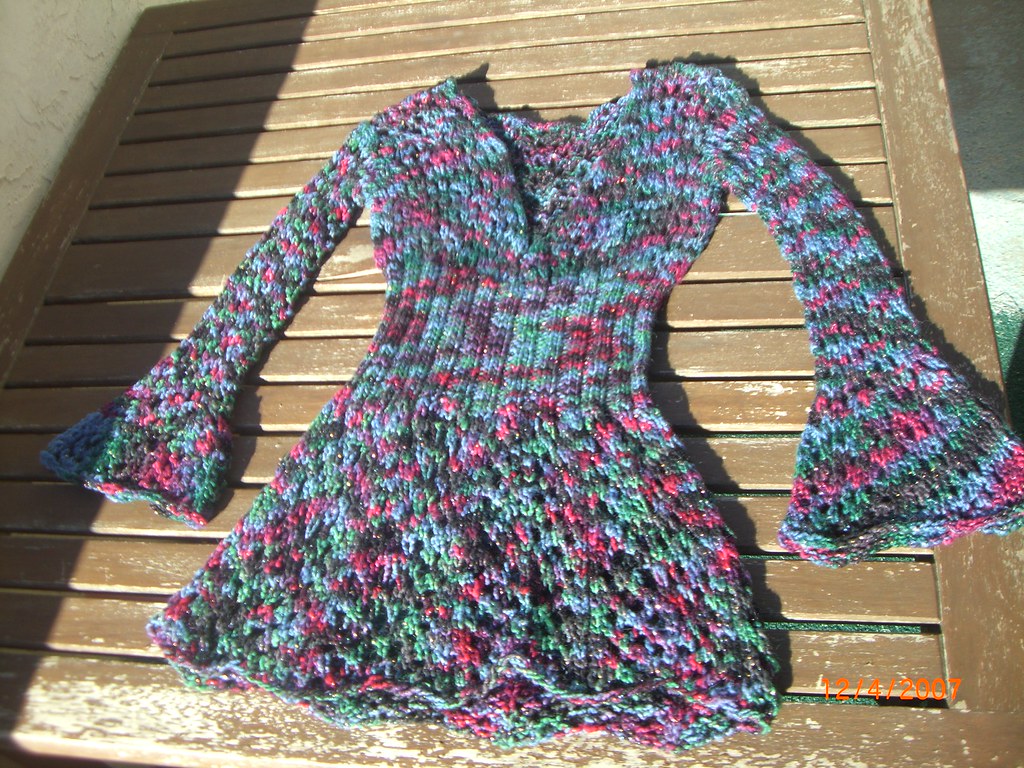 Name of Project: Cherie Amour
Yarn: Cherry Tree Hill Glitter Thick and Thin - Quarry Hill
Size and Yardage: Size Small used One and half hanks
Yarn Source: Discontinuedbrandnameyarn.com
Needles: Size US 7 and 11 Knit Picks Interchangeable needles
Estimated Time to Complete Project: 5 weeks
Modifications: I had to go down a needle size to get gauge, and I changed the sleeves.
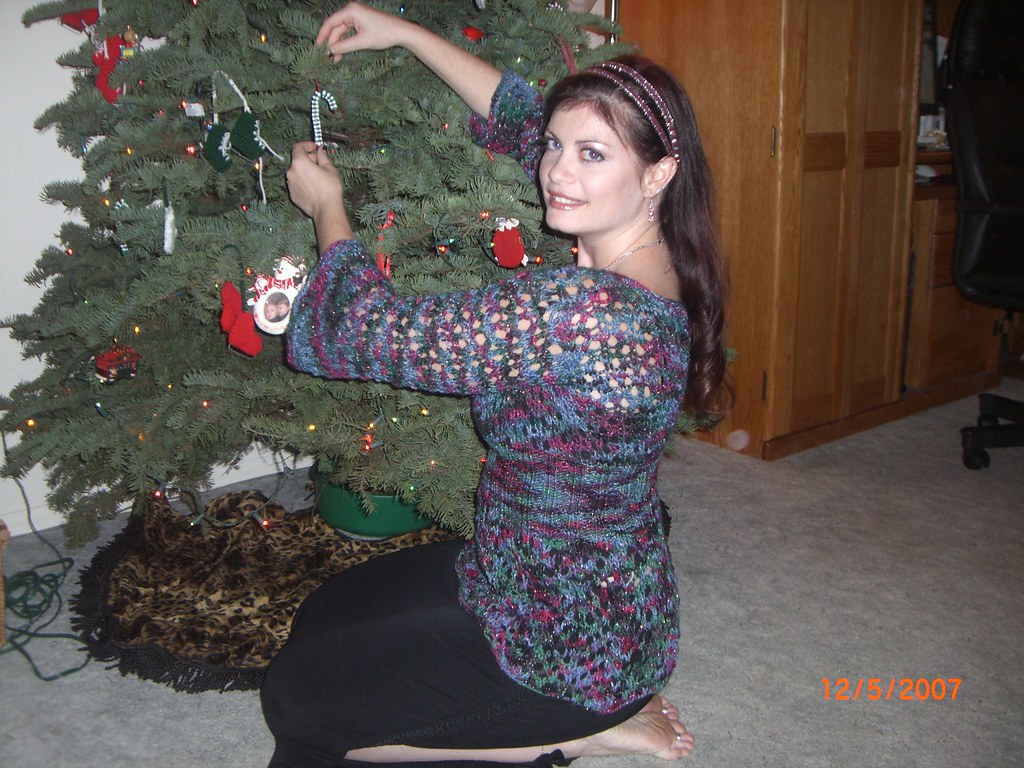
I decided to pick up stitches around the armholes instead of flat knitting a sleeve and then seaming it and trying to get it to fit in the armhole. I've tried sewing a completed sleeve into the armhole before and it never has worked out good for me. I figured out a multiple of the lace pattern that would pick up nicely around the arm. It was 30 stitches. I worked the Lace Pattern 2 for 7 inches then flared out the sleeve. The yarn is so scratchy I didn't want it to go all the way down my arms so I decided to do 3/4 sleeves. I re-charted Lace Pattern 2 to increase the sleeve from 30 stitches to 50 stitches. It was really not that bad once I figured out where to put the increases in the chart pattern.
 I still kind of new to sweater knitting and I was having a really hard time after the ribbing and wasn't able to figure it out. So after a little research I found a post on the web from the designer -
 After you divide for the armholes, you should have 22 stitches on the needle and the WS should be facing you. Work row 16 of the neckline decrease chart (purl all the way across). Now with RS facing you, K1 and then go straight into the pattern repeat for row 17 on the neckline decrease chart. Work the pattern repeat until you have three stitches remaining on the left-hand needle. K2tog and K1. Purl all stitches on the next row and then work row 19 in the same manner, stopping three stitches shy from the end of the row, K2tog and then K1. You should be decreasing by one stitch each right-side row until you have 14 stitches left on your needle. Work the pattern repeat box after that point until your panel reaches the prescribed length from the armhole beginning (where you BO stitches after placing the back stitches on hold) as per your pattern sizing instructions. Your last row worked should be a WS (purl) row. Place stitches on a holder and break yarn (do not bind off!).
Do the same thing for the right-hand side only use the SSK decrease instead of K2tog. SSK is a left leaning decrease so it makes the neckline shaping much smoother.
After reading this I was able to finish the top.
My blocking experience was interesting. I put the sweater in warm water with a little Soak, squeezed the excess water out and layed out flat on the floor. The yarn and lace had relaxed so much that the sweater was absolutely HUGE! It was very scary at first because I thought that something had gone terribly wrong. But as it dried, I would pick it up and lay it flat again and it slowly but surely took back it's intended shape and after two and half days of blocking, came out lovely.
 A special note of thanks to my husband for helping me photograph my sweater. :)
3 comments:
The sweater turned out really nice - I'm glad I got to see it in person. Picking up stitches for the sleeves is genius! Why seam when you don't have to? :)
You and your sweater look so pretty!
Such a pretty sweater. It's a shame the yarn fiber is scratchy.
No one else will know anything except how nice you look in your Handknit sweater.
Post a Comment